
AI-generated code can pass a quick local check and still break authentication, migrations or background jobs when you deploy it. A staging environment on a VPS gives you somewhere to catch those failures before customers encounter them. The useful result is a reviewed release you can identify, test and roll back—not merely a second server running the latest code.
This guide uses a separate Ubuntu 24.04 LTS VPS, Docker Compose and Nginx for a conventional web application. It assumes you already have an application image that listens on port 8000 and provides a non-sensitive /healthz endpoint. Adapt those two details to your app. The examples are configuration patterns, not a benchmark or a claim that your application has been tested. AI-generated code does not, by itself, require an inference engine or GPU.
Run your staging app on a separate VPS and catch broken changes before they reach users.
Define What Staging Must Prove
Keep staging separate from production: a different VPS, credentials, database, storage and external-service accounts. Give it an obvious hostname such as staging.example.com, and put a visible staging label in the app. A separate environment reduces the consequences of a mistake; it does not make unreviewed code safe to execute.
Match the parts that affect behavior: CPU architecture, runtime version, database major version, reverse-proxy behavior and background workers. Choose memory, CPU and disk capacity from your application’s documented requirements and observed usage. A small functional test server cannot establish production capacity. For latency comparisons, also match the relevant region and network path; there is no reliable universal milliseconds-per-kilometre rule.
| Keep comparable | Keep isolated |
|---|---|
| Runtime, dependencies and application image | Credentials and access permissions |
| Database engine and migration sequence | Database contents, backups and storage |
| Proxy, HTTPS and application settings | Hostname, cookies and external callbacks |
| Representative request and job patterns | Email, payments and other side effects |
Before provisioning, define acceptance criteria for one important user journey, permission checks, error handling and a rollback rehearsal. Treat these as your release checklist. For broader container planning, see the Docker VPS hosting guide.
Secure SSH Access Before You Deploy

Use a non-root administrator with a tested SSH key and working sudo. Keep the current SSH session open and confirm that the provider console works before changing access. If your provider injects a public key at provisioning, use that supported route. Otherwise, create a separate key on your workstation and install its public half for your administrator:
ssh-keygen -t ed25519 -a 100 -f ~/.ssh/staging_vps
ssh-copy-id -i ~/.ssh/staging_vps.pub stagingadmin@YOUR_SERVER_IP
ssh -i ~/.ssh/staging_vps stagingadmin@YOUR_SERVER_IP
Replace the username and address with your own. After verifying a second key-based login and sudo, inspect the existing SSH snippets and add your policy in an early-loading file such as /etc/ssh/sshd_config.d/00-staging.conf:
PubkeyAuthentication yes
PasswordAuthentication no
KbdInteractiveAuthentication no
PermitRootLogin no
Ubuntu uses the first configured value for most SSH settings, so inspect the effective result rather than assuming the filename overrides everything. Validate before reloading, then open another new session before closing the working one. Ubuntu’s OpenSSH guidance explains the snippet and validation behavior.
sudo sshd -t
sudo sshd -T | grep -E 'pubkeyauthentication|passwordauthentication|kbdinteractiveauthentication|permitrootlogin'
sudo systemctl reload ssh
Allow SSH only from your administrative address or VPN where practical. Permit TCP 80 for the certificate challenge and TCP 443 for HTTPS; keep database and app ports off the public interface. Verify both IPv4 and IPv6 rules. Docker-published ports can bypass UFW rules, so the explicit loopback binding below is essential—not a substitute for reviewing the host and provider firewalls.
Install Docker and Docker Compose
Use Docker’s official Ubuntu installation procedure for the Engine and Compose plugin. This guide targets Ubuntu 24.04; do not paste its Ubuntu repository into Debian or a RHEL-family system. On an existing server, review conflicting packages and workloads before removing anything. Use a current supported Docker Engine, including the fixes for localhost-published ports introduced in version 28.0.0.
sudo docker version
sudo docker compose version
sudo systemctl is-active docker
sudo docker run --rm hello-world
A successful hello-world run checks installation only. It says nothing about your application, database or firewall. Keep Docker commands behind sudo here: membership in the Docker group grants root-level privileges. Never give generated application code the Docker socket, a privileged container or unrestricted host-directory mounts.
Build the application image from reviewed source and locked dependencies in CI. Do not automatically install machine-learning libraries just because an AI wrote some of the code. Run the app as a non-root user within the image and ensure it listens on 0.0.0.0:8000 inside its container. Containers share the host kernel; they are not a complete sandbox for hostile code. Review Docker’s security model before choosing stronger isolation for untrusted workloads.
Deploy a Reviewed Image With Staging-Only Secrets

Deploy the image that passed your build checks by its registry digest, rather than a moving latest tag. Keep the source commit, image digest and configuration revision together in your release record. A digest identifies the artifact; it does not prove that artifact is secure. Docker supports pulling an image by digest.
Create /opt/staging-app for the Compose configuration and a root-only directory outside the repository for runtime secrets. The following creates an empty configuration file; edit it to contain only the staging values your application actually needs:
sudo install -d -m 0755 /opt/staging-app
sudo install -d -m 0700 /etc/staging-app
sudo touch /etc/staging-app/app.env
sudo chmod 0600 /etc/staging-app/app.env
sudoedit /etc/staging-app/app.env
Use a separate staging database account, test-mode API keys and sandbox service endpoints. Do not copy production credentials or bake secrets into the image. Environment files are convenient but values can still reach process inspection or debug logs. If your application supports reading secret files, Compose secrets can mount individual values instead; the app must explicitly support that convention.
Save this as /opt/staging-app/compose.yaml. It deliberately publishes the app only on IPv4 loopback. The application image must already define a suitable non-root runtime user; adapt writable directories to your application rather than granting broad host access.
services:
  app:
    image: ${STAGING_IMAGE:?Set a reviewed image digest}
    init: true
    restart: unless-stopped
    env_file:
      - /etc/staging-app/app.env
    environment:
      APP_ENV: staging
    ports:
      - "127.0.0.1:8000:8000"
    cap_drop:
      - ALL
    security_opt:
      - no-new-privileges:true
    logging:
      driver: local
Save a separate /opt/staging-app/release.env containing STAGING_IMAGE=your-registry/your-app@sha256:YOUR_VERIFIED_DIGEST, substituting the exact registry reference from your build. Authenticate to a private registry using its supported login method if required. These examples do not deploy a database: provision a separate staging database and configure its reachable address in the runtime environment file.
cd /opt/staging-app
sudo docker compose --env-file release.env config --quiet
sudo docker compose --env-file release.env pull app
sudo docker compose --env-file release.env up -d app
sudo docker compose --env-file release.env ps
curl --fail --silent --show-error --max-time 10 http://127.0.0.1:8000/healthz
The last request may need repeating after startup; it must eventually return the expected healthy response. Use configuration validation with --quiet so expanded secrets are not printed into terminal or CI logs. The loopback mapping follows Docker’s port-publishing guidance; verify externally that the VPS’s public port 8000 is unreachable.
Put Nginx and HTTPS in Front of the App
Create a DNS record for your staging hostname pointing to this VPS. If you publish an AAAA record, IPv6 must reach the same intended server. Install Nginx and the password-file utility on Ubuntu:
sudo apt update
sudo apt install nginx apache2-utils
sudo systemctl enable --now nginx
Start with a minimal HTTP-only server block in /etc/nginx/sites-available/staging. Replace the hostname; the app stays inaccessible through this initial block while you obtain a certificate:
server {
    listen 80;
    server_name staging.example.com;
    location / {
        return 404;
    }
}
sudo ln -s /etc/nginx/sites-available/staging /etc/nginx/sites-enabled/staging
sudo nginx -t
sudo systemctl reload nginx
On a fresh server the symlink should not already exist; inspect it before rerunning. Follow Certbot’s current Nginx installation instructions, then request a certificate with the Nginx plugin. Do not configure certificate paths before those files exist. HTTP-01 validation requires publicly reachable port 80; use a supported DNS challenge instead if that conflicts with your access policy.
sudo certbot --nginx -d staging.example.com --redirect
sudo certbot renew --dry-run
Create a reviewer password interactively. Use -c only for the first password file; it overwrites an existing file. Keep the password unique to staging.
sudo htpasswd -c /etc/nginx/staging.htpasswd reviewer
sudo chown root:www-data /etc/nginx/staging.htpasswd
sudo chmod 0640 /etc/nginx/staging.htpasswd
After Certbot has created the HTTPS server, replace its location / block with this proxy block. Retain Certbot’s TLS directives and the HTTP-to-HTTPS redirect. This uses Nginx Basic Authentication for a simple private preview and forwards requests to the local app:
location / {
    auth_basic "Staging review";
    auth_basic_user_file /etc/nginx/staging.htpasswd;
    add_header X-Robots-Tag "noindex, nofollow" always;
    proxy_pass http://127.0.0.1:8000;
    proxy_set_header Host $host;
    proxy_set_header X-Real-IP $remote_addr;
    proxy_set_header X-Forwarded-For $proxy_add_x_forwarded_for;
    proxy_set_header X-Forwarded-Proto $scheme;
    proxy_set_header Authorization "";
}
sudo nginx -t
sudo systemctl reload nginx
curl --silent --output /dev/null --write-out '%{http_code}\n' https://staging.example.com/
curl --fail --silent --show-error --user reviewer https://staging.example.com/healthz
Expect 401 without reviewer credentials. The second request prompts for the reviewer password and should return your app’s healthy response. Use credentials only over HTTPS. The proxy clears the preview password before forwarding the request; applications that require their own Authorization header need a different access design, such as a VPN or an identity-aware proxy. Configure trusted proxies in the app, and test WebSockets separately if you use them. The noindex header is indexing guidance, not access control. See the Apache vs Nginx comparison for the wider web-server trade-offs.
Use Synthetic Data and Sandbox Integrations

Seed staging with synthetic fixtures first: a normal account, an expired session, an empty result, a large valid record and a forbidden cross-account request. Preserve the relationships and edge cases your tests need without copying private customer data. Make the seed operation explicit about its target and keep it separate from deployment.
- Point email at a test inbox or capture service; verify that no real recipients are contacted.
- Use payment-provider test mode and separate webhook URLs and secrets.
- Give storage, search, queues and background workers staging-specific resources and permissions.
- Prevent staging credentials from accessing production databases or buckets. Restrict outbound access where the application allows it.
- Test that scheduled jobs and retry queues cannot call live integrations when staging starts or restarts.
If a production-derived dataset is essential, use an approved export and sanitization process before the data enters staging. Check free-text fields, uploaded files, logs, tokens and linked tables as well as names and email addresses. Generic SQL replacements cannot prove anonymization, and predictable hashes are not replacement API credentials. Record who approved the dataset, its retention limit and how you verified the result.
Connect GitHub Actions to a Reviewed Deployment
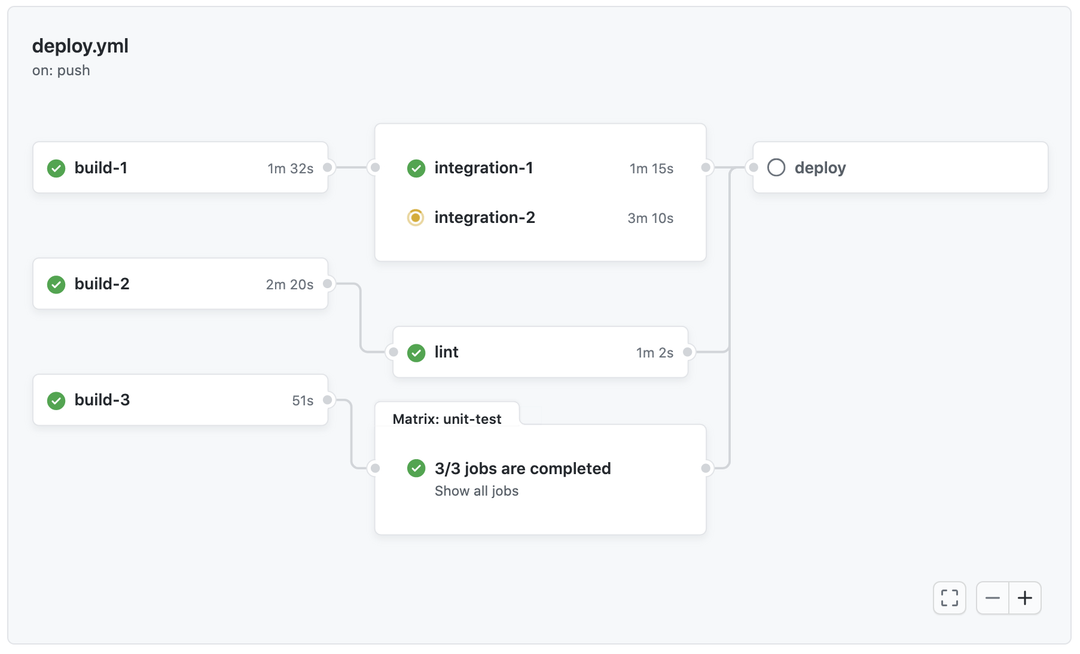
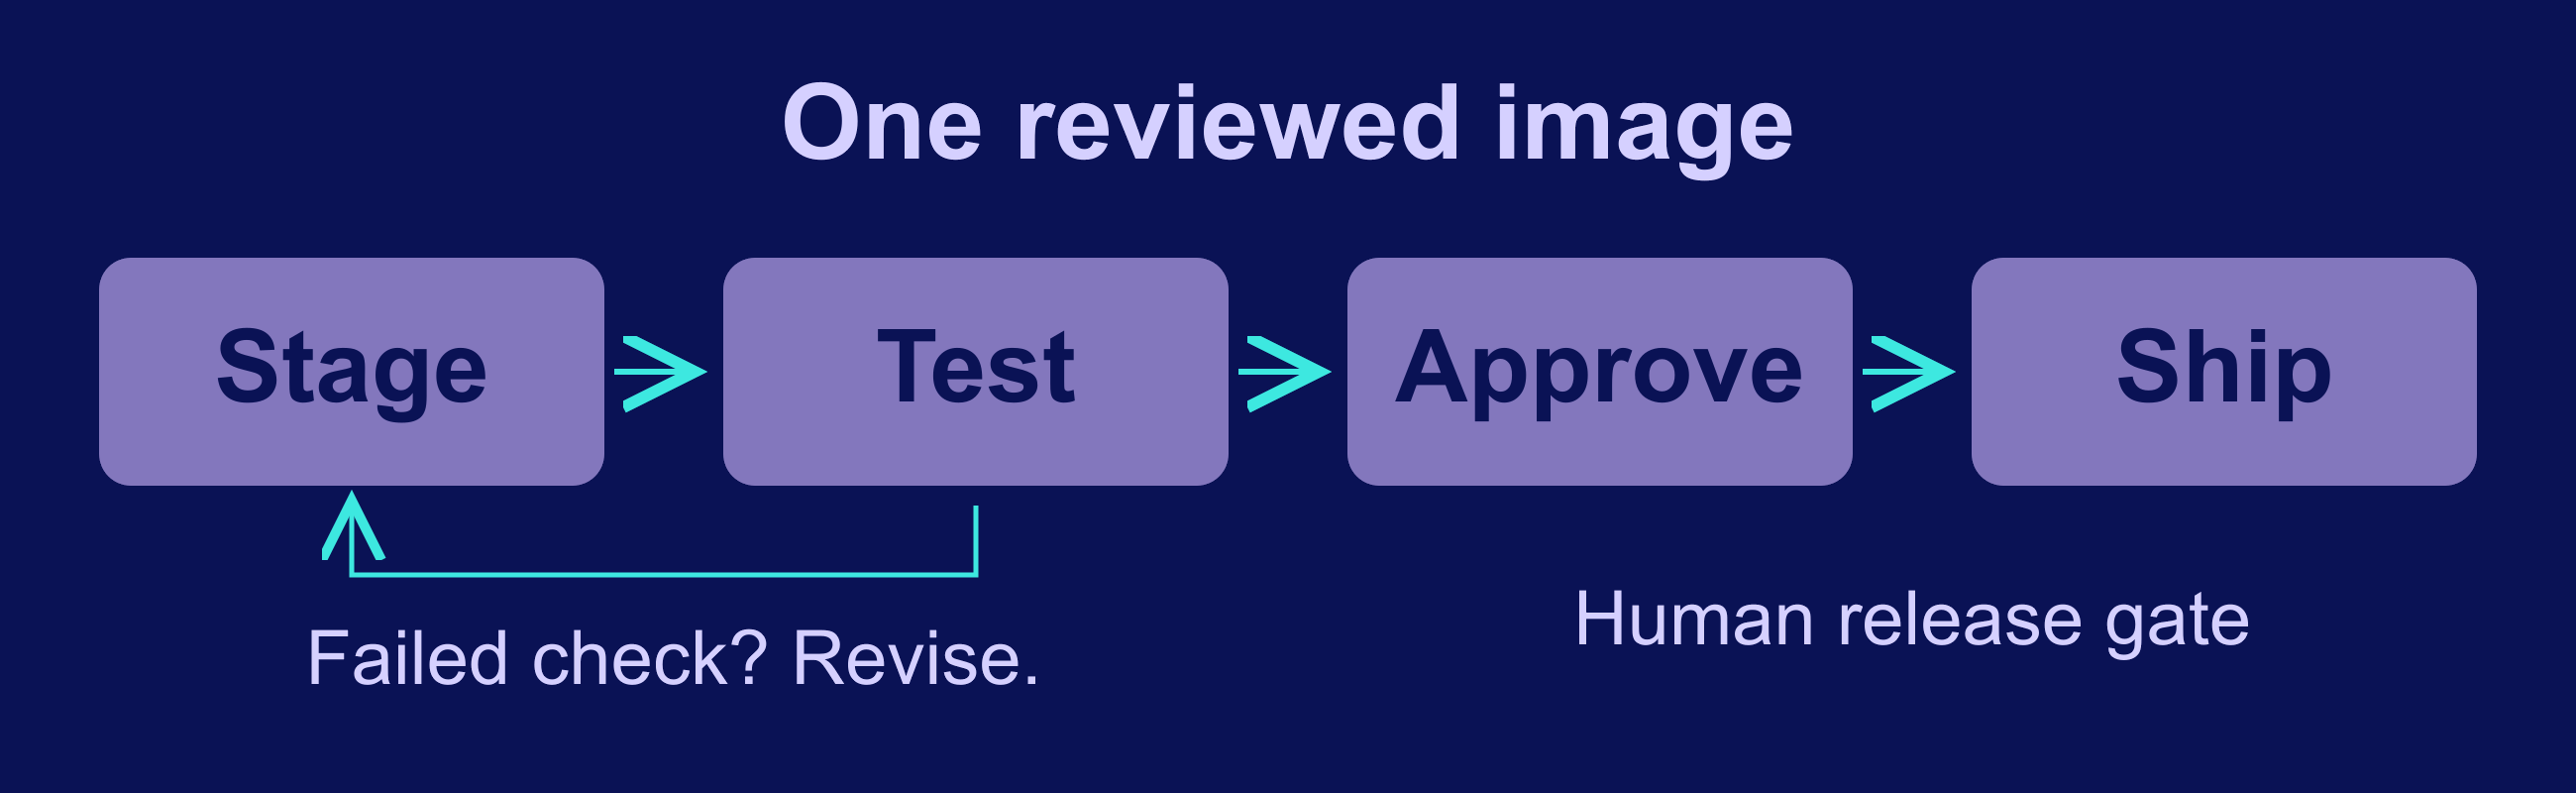
The GitHub documentation screenshot shows an example workflow graph; its job timings are sample interface data, not measurements from this guide. Automate only after the manual staging path works. In GitHub Actions, separate a build-and-test job from a deployment job. Give untrusted pull requests no deployment credentials. The build should test the app, create the image once and record its digest; the deployment should consume that approved digest without rebuilding from a moving branch. Use the same artifact when you later promote the release.
Create the staging environment explicitly, restrict its eligible branches and store only staging credentials there. Where your repository plan supports it, require a reviewer before the deployment job can access environment secrets. GitHub’s environment documentation describes the current plan and repository-visibility limits. If a protection rule is unavailable, keep an equivalent human-controlled release step rather than assuming the environment name supplies approval.
- Run tests and dependency checks before producing the deployable artifact. Pin third-party actions to reviewed full commit SHAs and minimize token permissions.
- Limit concurrency to one staging deployment so a newer job cannot race the release being tested.
- Use a staging-only deployment credential. A user allowed to control Docker is effectively privileged on that staging host.
- Verify the server’s SSH host-key fingerprint through the provider console or another trusted channel, then store the verified known-hosts entry. Keep strict host-key checking enabled.
- Deploy the recorded image digest, check application readiness and save the test result against that exact digest. Require a separate decision for production promotion.
Do not populate trusted host keys from an unchecked ssh-keyscan result during every job: OpenSSH explicitly warns that key scanning does not authenticate the server. Also avoid indiscriminate synchronization with --delete or post-deploy cleanup that removes the previous release. GitHub’s workflow-security guidance covers secrets, least privilege and untrusted input. The DevOps practices guide provides broader process context.
Test More Than the Health Endpoint
A healthy process can still return another customer’s data or fail on the first checkout. Test the behavior the release is supposed to change, plus the boundaries it could accidentally weaken. Use test accounts and sandbox transactions only. The following checks make a useful minimum review record; adapt the expected results to your app.
| Check | Evidence to retain |
|---|---|
| Access and authentication | Unauthenticated staging request rejected; valid reviewer and app login work |
| Authorization | One test account cannot read or change another account’s records |
| Main user journey | Expected result from the real browser flow and relevant API calls |
| Invalid input and failures | Safe errors; no stack traces, secrets or unintended writes |
| Jobs and integrations | Only staging queues, test email and sandbox external services used |
| Migration and restart | Approved schema change and restart preserve intended state |
| Resource behavior | CPU, memory, disk and logs observed under a documented test load |
Inspect the actual page at desktop and phone widths, including validation messages, uploads and session expiry. For a reported failure, retain the source commit, image digest, request description and a redacted log excerpt. These are observations from your test run, not a universal claim about AI code or VPS performance.
cd /opt/staging-app
sudo docker compose --env-file release.env ps
sudo docker compose --env-file release.env logs --tail=100 app
sudo docker stats --no-stream
sudo docker system df
A single resource snapshot does not establish capacity. If performance matters to the release, define a representative workload, duration and acceptable limits before testing; record those conditions alongside the results. Investigate unusual memory growth, repeated restarts or error-rate changes rather than treating a green CI status as sufficient approval.
Rehearse Rollback Before Promotion
Before an update, retain the previous approved image digest, Compose configuration, runtime configuration version and any required database backup. Save the previous release.env as rollback.env before replacing it. Keep the old image available in the registry. On first deployment there is no previous release to restore.
For an application-only change with a compatible database schema, restore the prior release record and recreate the app service:
cd /opt/staging-app
sudo cp rollback.env release.env
sudo docker compose --env-file release.env config --quiet
sudo docker compose --env-file release.env pull app
sudo docker compose --env-file release.env up -d --no-deps app
curl --fail --silent --show-error --max-time 10 http://127.0.0.1:8000/healthz
Then repeat the user-journey and permission checks. If a migration changed or deleted data, an older image alone may be incompatible. Rehearse your database-specific restore or forward-fix procedure separately. Keep snapshots and backups consistent with the database’s recovery requirements; a generic provider snapshot is not proof of a recoverable database.
Do not run volume pruning as routine deployment cleanup or invent a provider snapshot API. Inspect disk usage and remove only identified expendable artifacts after you have proved rollback. Promote the recorded image digest only when staging checks pass, the rollback path works and a person accepts the release. Staging gives you evidence for that decision; it does not eliminate the need for it.
Frequently Asked Questions
Can staging share a VPS with production?
Is a hidden URL or noindex enough to protect staging?
Why deploy an image digest instead of latest?
Does rolling back the container reverse a database migration?