
This guide explains how to verify whether your nginx or Apache deployment is exposed to the HTTP/2 Bomb vulnerability, how to identify potential exploitation, and how to apply the appropriate patches and mitigations. Follow the steps below to ensure your production web servers are protected.
Step 1: Detect and Confirm the HTTP/2 Bomb Vulnerability
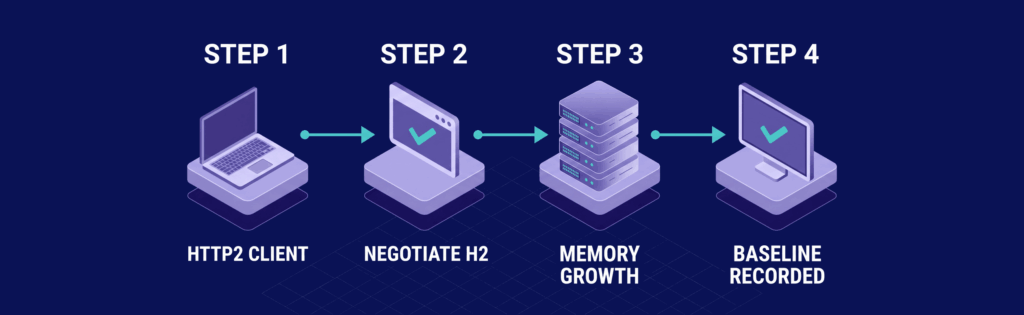
Before making any changes to packages or configuration, confirm the following:
- Your server is accepting HTTP/2 connections.
- A single HTTP/2 client can trigger abnormal memory growth.
If HTTP/2 is disabled, this specific attack vector does not apply. When enabled, you need a baseline to verify that subsequent fixes are effective.
Confirm HTTP/2 Support
The commands below check ALPN (Application-Layer Protocol Negotiation), the TLS extension that decides whether the connection uses HTTP/2 (`h2`) or HTTP/1.1.
curl -I --http2 -s https://your-domain.com | head -n 1
openssl s_client -connect your-domain.com:443 \
  -servername your-domain.com \
  -alpn h2 </dev/null 2>/dev/null | grep ALPN
A vulnerable server must negotiate HTTP/2 successfully. Verify the result shows:
HTTP/2 200
and:
ALPN protocol: h2
If you only see `HTTP/1.1` or no `h2` in the ALPN output, stop here and check your web server configuration before proceeding.
Capture a baseline of current memory usage and active connections to use as a reference during testing:
free -m
ss -tan | grep :443 | wc -l
Record these values for later comparison.
Step 2: Upgrade nginx to the Patched Version
If your server accepts HTTP/2 traffic, the recommended fix is to upgrade nginx to version 1.29.8 or later. Although configuration workarounds may help reduce risk, the patch permanently removes the vulnerable code path.
Start by checking the version currently running:
nginx -v
Expected output might be:
nginx version: nginx/1.29.7
Any version older than 1.29.8 should be upgraded immediately. For additional details on web server options, see Apache vs NGINX: Which Web Server Is Right for You?.
The commands below update nginx using the standard package manager on major Linux distributions:
# Debian / Ubuntu
sudo apt update
sudo apt install --only-upgrade nginx

# RHEL / AlmaLinux / Rocky Linux 8+

sudo dnf clean all
sudo dnf update nginx

#CentOS 7 and older yum-based systems

sudo yum clean all
sudo yum update nginx

#openSUSE / SUSE Linux Enterprise

sudo zypper refresh
sudo zypper update nginx
After upgrading, verify the new version:
nginx -v
Expected output:
nginx version: nginx/1.29.8
If your distribution repository still provides an older release, verify whether you are using a vendor-maintained package instead of the official nginx repository. Many enterprise distributions backport security fixes without changing the major version number. To check, inspect the package changelog:
rpm -q --changelog nginx | head -50
or
apt changelog nginx
Reload nginx so that workers start using the patched binaries:
sudo systemctl reload nginx
If reloading fails, fully restart the service:
sudo systemctl restart nginx
Finally, verify that nginx is running normally:
systemctl status nginx --no-pager
nginx -v
Expected output should include:
Active: active (running)
nginx version: nginx/1.29.8
Step 3: Configure nginx Fallback Directives
While a patched nginx build is the primary defense, configuration limits add a secondary layer of protection. The HTTP/2 Bomb attack abuses HPACK compression to expand small requests into significantly larger memory allocations. Limiting accepted header sizes reduces the amount of data processed before a request is rejected.
Open your nginx configuration file:
sudo nano /etc/nginx/nginx.conf
Adjust the configuration as follows to limit HTTP/2 header processing, and to disable HTTP/2 entirely if necessary:
http {
# Restrict oversized compressed header expansion
http2_max_header_size 64k;
# Some builds may expose an equivalent max_header_size directive
max_header_size 64k;
}

server {
listen 443 ssl;
# HTTP/2 disabled as an emergency mitigation
ssl_certificate     /etc/ssl/certs/site.crt;
ssl_certificate_key /etc/ssl/private/site.key;
}
The key chain remove the vulnerable protocol path. Replace the line:
listen 443 ssl http2;
with:
listen 443 ssl;
After making changes, validate the configuration:
sudo nginx -t
If successful, activate the new settings:
sudo systemctl reload nginx
Step 4: Upgrade Apache httpd and mod_http2

For servers using Apache to handle HTTPS traffic, patching the `mod_http2` module is critical. The fix requires Apache with `mod_http2` v2.0.41 or later, or a vendor package that backports the patch.
Check your Apache version and HTTP/2 module status:
apachectl -v
For Debian/Ubuntu systems:
apache2ctl -M | grep http2
For RHEL-based systems:
httpd -M | grep http2
Ensure that the `http2_module` is loaded. If it is not, your server is not serving HTTP/2 via Apache. Then update Apache and the HTTP/2 module accordingly:
# Ubuntu / Debian

sudo apt update
sudo apt install --only-upgrade apache2 libapache2-mod-http2
sudo a2enmod http2
sudo systemctl restart apache2

# RHEL 8+ / AlmaLinux / Rocky Linux

sudo dnf update httpd mod_http2
sudo systemctl restart httpd

# CentOS 7

sudo yum update httpd mod_http2
sudo systemctl restart httpd

# openSUSE / SUSE

sudo zypper refresh
sudo zypper update apache2 apache2-mod_http2
sudo systemctl restart apache2
Verify the upgrade:
apachectl -v
apachectl -M | grep http2
Expected output should resemble:
Server version: Apache/2.4.x
http2_module (shared)
If your enterprise distribution has backported fixes without a version change, review the package changelog:
# Debian / Ubuntu

apt changelog apache2

# for RHEL-based systems:
rpm -q --changelog mod_http2 | head -50
After updating, confirm that Apache is operating normally:
systemctl status apache2 --no-pager
or for RHEL-based systems:
systemctl status httpd --no-pager
Expected output should include:
Active: active (running)
Step 5: Configure Apache HTTP/2 Fallback Settings
If you cannot deploy the patched `mod_http2` immediately, a temporary mitigation is to stop accepting HTTP/2 connections. This removes the HPACK processing path exploited by the attack.
Open the main Apache configuration file or the relevant virtual host file:
sudo nano /etc/httpd/conf/httpd.conf
For Debian/Ubuntu systems:
sudo nano /etc/apache2/sites-enabled/your-site.conf
Insert the following configuration to disable HTTP/2 and tighten request header sizes:
ServerName example.com

# Emergency mitigation: disable HTTP/2

Protocols http/1.1

# Restrict oversized request headers

LimitRequestFieldSize 8190
LimitRequestFields 100
SSLEngine on
SSLCertificateFile /path/to/cert.pem
SSLCertificateKeyFile /path/to/key.pem
Validate the configuration syntax:
apachectl configtest
If the syntax is correct, reload Apache:
# RHEL, AlmaLinux, Rocky Linux

sudo systemctl reload httpd

# Debian / Ubuntu

sudo systemctl reload apache2
Verify that Apache continues to run normally:
systemctl status httpd --no-pager
or
systemctl status apache2 --no-pager
Step 6: Set Cgroup Memory Limits for HTTP/2 Processes
Patching addresses the vulnerability, and setting cgroup memory limits adds an extra layer of protection. Cgroups act as resource quotas, limiting memory allocation to prevent runaway consumption.
Create a systemd slice to enforce a memory limit (500 MB in this example) in /etc/systemd/system/http2.slice:
[Unit]

Description=HTTP/2 Protected Services

[Slice]
MemoryMax=500M
MemoryHigh=450M
MemorySwapMax=0
Reload systemd and start the new slice:
sudo systemctl daemon-reload
sudo systemctl start http2.slice
Verify that the slice has been created:
systemctl status http2.slice
Expected output:
Active: active
Assign your web server to this slice. For nginx, create an override file in /etc/systemd/system/nginx.service.d/override.conf:
[Service]
Slice=http2.slice
For Apache on Debian/Ubuntu in /etc/systemd/system/apache2.service.d/override.conf:
[Service]
Slice=http2.slice
Reload systemd and restart the affected service:
sudo systemctl daemon-reload
sudo systemctl restart nginx   # or apache2/httpd as applicable
Confirm that the service is running within the specified slice:
systemctl show nginx -p Slice
Expected output:
Slice=http2.slice
Step 7: Verify Mitigations and Set Up Ongoing Monitoring

The patch is only successful if the tests that previously exposed the vulnerability no longer cause abnormal behavior. Re-run your header-flood proof of concept and monitor system memory usage.
For example, use these commands:
Terminal 1:
watch -n 1 free -m
Terminal 2:
h2spec -h your-domain.com -p 443 -t -k
Terminal 3:
systemd-cgtop
Look for signs that memory usage remains stable, the service has not restarted unexpectedly, and there are no out-of-memory (OOM) kill events. Also, review the kernel log for OOM events:
journalctl -k -n 50 | grep -Ei "oom|killed process"
Expected output should confirm that there are no matching entries in the log.
Midway through these tests, if you are using VPSus Managed Hosting, you’ll benefit from automated patch management and proactive resource monitoring. Plans start at $9.99 per month and include support from our secure US-based data centers.
Audit Checklist`
- [ ] Confirm nginx or Apache package includes the HTTP/2 Bomb fix
- [ ] Verify that HTTP/2 protection directives are implemented
- [ ] Ensure cgroup memory limits are active
- [ ] Execute the header-flood validation test
- [ ] Check kernel logs for any OOM events
- [ ] Validate memory alert thresholds
- [ ] Document the results and schedule the next review
Store this checklist in your infrastructure documentation to facilitate future audits.
Frequently Asked Questions
What is the HTTP/2 Bomb vulnerability?
How do I confirm if my server supports HTTP/2?
Why upgrade nginx or Apache immediately?
What are cgroup memory limits?
How can I monitor if a mitigation is working?