
Plesk simplifies server management for VPS hosting, offering an intuitive interface to handle websites, applications, and server configurations. It eliminates the need for extensive command-line operations, making tasks like domain management, security setup, and backups straightforward. Here’s what you need to know:
- System Requirements:
- Linux: 1 GB RAM (2 GB recommended), 20 GB storage (40 GB recommended), 1.1 GHz CPU.
- Windows: 2 GB RAM, 32 GB storage (40 GB recommended), 1.1 GHz CPU.
- Compatible with popular Linux distributions and Windows Server versions (2016, 2019, 2022).
- Choosing a VPS:
- Assess hosting needs based on the number of websites, traffic, and scalability.
- Look for plans with reliable uptime, nearby server locations, and security features.
- Example: VPS.us offers plans starting at $10/month with global data centers and unmetered traffic.
- Installation:
- Use a one-line installer for Linux or GUI/console methods for Windows.
- Securely connect to your VPS via SSH to prepare for installation.
- Update the server OS to avoid compatibility or security issues.
- Post-Installation Setup:
- Secure admin accounts, configure server settings, and optimize performance.
- Set up automated backups and monitor server resources using built-in tools.
- Add domains, configure DNS, and manage user accounts effectively.
Plesk provides a centralized platform to manage hosting operations efficiently. By following these steps, you can set up a reliable and secure VPS environment tailored to your needs.
Prerequisites and VPS Selection for Plesk
Before you begin installing Plesk, it’s crucial to confirm that your VPS meets the technical requirements and to choose a hosting plan that aligns with your needs.
System Requirements for Plesk
Plesk has specific hardware and software requirements that must be met to ensure a smooth installation and reliable performance. Meeting these requirements upfront can save you from potential issues later.
Hardware Requirements
The hardware requirements vary slightly depending on the operating system:
- Linux: Requires 1 GB of RAM plus 1 GB of swap space, though 2 GB of RAM is recommended for better performance.
- Windows: Needs 2 GB of RAM, with 2 GB being the recommended configuration.
For storage, Linux installations demand at least 20 GB of free disk space, while Windows requires a minimum of 32 GB. To account for future growth and additional applications, it’s suggested to have 40 GB of disk space available. As for processing power, a 1.1 GHz CPU is sufficient for most Plesk setups.
Operating System Compatibility
Plesk supports a variety of Linux distributions, including Debian, Ubuntu, CentOS, Red Hat Enterprise Linux, CloudLinux, AlmaLinux, Rocky Linux, and Virtuozzo Linux. For Windows, it works with Windows Server versions 2016, 2019, and 2022. Using unsupported operating systems can lead to instability and a lack of updates or patches, so it’s essential to stick with the supported options.
Planning for Website Load
For shared hosting scenarios, allocate at least 1 GB of RAM for every 40–50 websites you plan to host. This ensures your server can handle typical loads efficiently.
| Requirement | Linux | Windows |
|---|---|---|
| RAM | 1 GB + 1 GB swap | 2 GB |
| Disk Space | 20 GB | 32 GB |
| CPU | 1.1 GHz | 1.1 GHz |
| Recommended RAM | 2 GB | 2 GB |
| Recommended Disk | 40 GB | 40 GB |
Once you’ve confirmed your system meets these requirements, the next step is selecting the right VPS plan.
Choosing the Right VPS Plan
After verifying your VPS can handle Plesk’s demands, it’s time to choose a hosting plan that matches your current needs and allows room for growth.
Resource Planning
Start by evaluating your requirements. Think about the number of websites you’ll host, expected traffic levels, and any resource-heavy applications you might use. VPS hosting provides dedicated resources like CPU, RAM, and storage, ensuring consistent performance compared to shared hosting.
Scalability
Pick a VPS plan that allows you to upgrade resources easily. As your hosting demands grow, having the ability to scale up without switching providers will save time and effort.
Uptime and Reliability
Look for hosting providers offering a 99.9% uptime guarantee, which translates to less than 9 hours of downtime annually. This ensures your websites remain available to visitors most of the time.
Server Location
The location of your server can significantly impact loading times for your audience. If most of your visitors are in a specific region, choose a data center nearby to reduce latency. For global audiences, opt for providers with multiple data center locations.
VPS.us Hosting Solutions
VPS.us offers a range of plans that meet Plesk’s requirements and provide global coverage. Here are some of their options:
- KVM1-US Plan: $10/month for 1 vCore, 1 GB RAM, and 20 GB NVMe storage. This is suitable for basic Linux installations.
- KVM2-US Plan: $20/month for 2 vCores, 2 GB RAM, and 25 GB NVMe storage. This matches Plesk’s recommended specs.
- KVM4-US Plan: $40/month for more demanding setups.
- KVM8-US Plan: $80/month for hosting multiple websites or resource-heavy applications.
All plans include unmetered traffic, so you won’t have to worry about bandwidth limits. With 17 data centers across Africa, Asia, the UAE, the United States, and Europe, you can choose the best location for your audience.
Security and Support
Ensure your VPS provider offers essential security features like DDoS protection, firewalls, SSL certificate support, and regular backups. VPS.us provides enterprise-grade hardware and 24/7 customer support to assist you whenever needed.
Managed vs. Unmanaged VPS
Your choice between managed and unmanaged VPS depends on your technical skills. Managed plans handle server maintenance for you, while unmanaged plans offer more control and customization. Since Plesk includes an intuitive control panel, unmanaged VPS plans often strike a good balance between cost and usability.
Connecting to Your VPS
Once you’ve chosen and verified your VPS, the next step is to securely connect so you can start installing Plesk.
Setting Up an SSH Connection
SSH, short for Secure Shell, is the go-to protocol for safely accessing remote servers, especially Linux-based ones. It establishes an encrypted link over a network, allowing you to run commands, transfer files, and manage your server without compromising security.
What You Need to Connect
Before you begin, make sure you have these details from your VPS provider:
- IP address of your server
- Username (commonly
rootfor admin access) - Password or SSH key
- SSH port (default is 22)
Connecting from Linux or macOS
If you’re using Linux or macOS, you’re in luck – OpenSSH is built right in. To connect, open your terminal and type:
ssh username@server-ip-address
Replace username with your VPS username (likely root) and server-ip-address with your server’s IP. For example:
ssh root@192.168.1.100
When connecting for the first time, you’ll be asked to confirm the server’s fingerprint. This step ensures you’re connecting to the correct server. Type yes and hit Enter to proceed.
Connecting from Windows
Windows users can use PuTTY, a free and widely used SSH client. Here’s how:
- Open PuTTY.
- In the “Host Name (or IP address)” field, enter your server’s IP address.
- Ensure the port is set to 22 (or your custom SSH port).
- Select “SSH” as the connection type.
- Click “Open” to start the session.
When prompted, enter your username (likely root) and password to log in.
Troubleshooting SSH Issues
If you can’t connect, double-check your firewall settings and SSH configuration to ensure nothing is blocking access.
Boosting SSH Security
For added protection, consider changing the default SSH port from 22 to a custom port. Another effective measure is switching to key-based authentication, which uses a public/private key pair instead of a password. These steps make it harder for unauthorized users to access your server.
Updating the Server Operating System
Before diving into Plesk installation, it’s crucial to update your server’s operating system. Keeping your OS up to date ensures better security and avoids potential compatibility issues.
Why Updates Are Important
System updates often include critical security patches, bug fixes, and compatibility enhancements. Skipping this step could lead to installation errors, security vulnerabilities, or performance hiccups. A quick update now can save you from bigger headaches later.
Updating Ubuntu Servers
If your VPS runs on Ubuntu, use the following command to update it:
sudo apt update && sudo apt upgrade -y
Here’s what happens:
apt updaterefreshes the package list.apt upgrade -yapplies all available updates automatically.
Updating CentOS Servers
For CentOS-based systems, run this command:
sudo yum update -y
This updates all installed packages to their latest versions.
What to Expect During the Update
Depending on your server’s specs and internet speed, the update process can take anywhere from 5 to 15 minutes. Let it finish completely before proceeding.
Rebooting and Verifying Updates
Some updates, like kernel updates, may require a reboot. If prompted, restart your server with:
sudo reboot
After rebooting, reconnect via SSH and confirm your system is updated by checking the kernel version:
uname -r
Once your SSH connection is established and your OS is updated, you’re ready to move on to installing Plesk.
Installing Plesk Control Panel
Once your server is updated, you’re ready to install Plesk. Whether you’re working with Linux or Windows, Plesk offers simple installation processes that are beginner-friendly and efficient.
Using the Plesk One-Line Installer
For Linux servers, the one-line installer is the easiest way to set up Plesk. It downloads the latest stable version and configures your control panel with default settings suitable for most hosting needs.
Preparing Your Linux Server
Before you begin, make sure your server meets Plesk’s installation requirements. Remove any software that could cause conflicts, such as Apache, MySQL, or SELinux. These can interfere with the setup process.
Double-check that your firewall allows traffic through TCP ports 8443 and 8447, as these are essential for Plesk to function properly.
Running the One-Line Installer
Once your server is ready, installing Plesk is as simple as running a single command. Log in to your Linux server as the root user via SSH and execute:
sh <(curl https://autoinstall.plesk.com/one-click-installer || wget -O - https://autoinstall.plesk.com/one-click-installer)
This command downloads and runs Plesk’s official installer script. Depending on your network speed, server specs, and operating system, the installation may take anywhere from 15 minutes to an hour. The script will handle everything – resolving dependencies, downloading necessary packages, and configuring services – while keeping you updated through the terminal.
Once the installation is complete, you can log in and confirm that everything is working as expected.
Installing Plesk on Windows
For Windows servers, installation begins by logging in via RDP and downloading the Plesk Installer. Before starting, ensure your server meets the minimum requirements (e.g., a VPS of type S or higher) and that all Windows updates are installed.
Using the GUI Installer:
- Open the command prompt, navigate to the folder where the installer is saved, and run:
plesk-installer.exe --web-interface - The installer will open in your web browser. Log in using your Windows administrator credentials.
- Choose your installation type:
- Recommended: Installs the components needed for web hosting and standard features.
- Full: Installs all Plesk components and features.
- Custom: Lets you pick specific components based on your requirements.
Installation on Windows typically takes 30 to 90 minutes, depending on your system’s resources, internet speed, and the components you select.
Console Installation:
If you’re working with a Server Core installation that lacks a desktop environment, you can install Plesk using the command line. Run:
plesk-installer.exe --console
First Login and Troubleshooting
Once Plesk is installed, access the control panel by navigating to:
https://your-server-ip:8443 (replace “your-server-ip” with your server’s actual IP address).
Initial Login Process
During your first login, use your administrator credentials. Plesk will guide you through a quick setup process, including:
- Setting up the administrator email and password
- Entering your license activation code or opting for a trial license
- Configuring basic server settings
Common Installation Issues
Sometimes, installation hiccups can occur. Dependency errors are common if pre-installed packages interfere with the process. To avoid this, start with a minimal operating system.
If you encounter problems, try running the repair tool:
sudo plesk repair all -y -v
For services like Nginx or Apache that don’t start automatically (an issue with older installations), you may need to tweak their configuration files. License key problems can usually be resolved in Plesk under Tools & Settings > License Management.
If you face access issues due to IP restrictions, adjust the policy using the psa database. You can also reset the administrator password via SSH if needed.
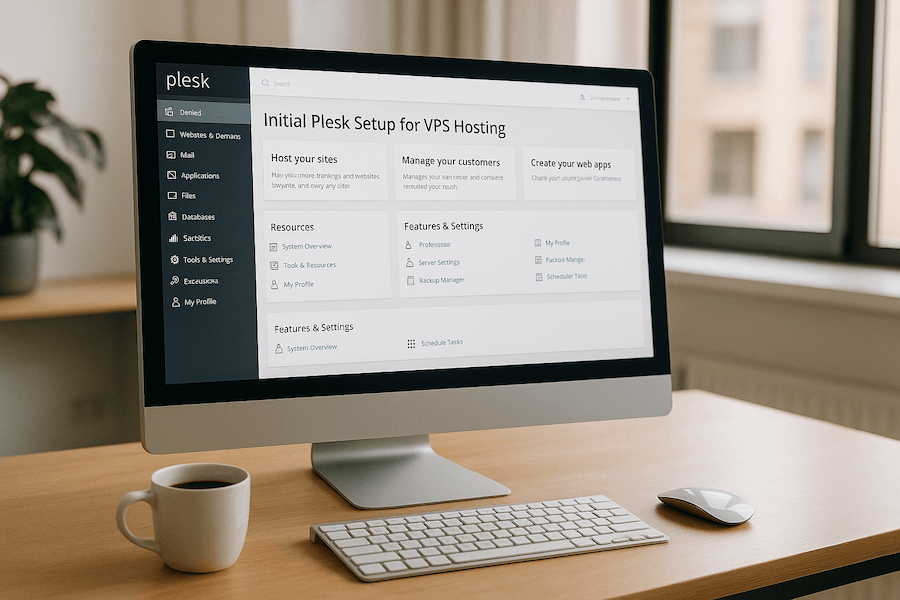
Basic Plesk Configuration
Once you’ve completed the installation, these configuration steps will help you establish a solid foundation for managing your server and optimizing your VPS for hosting.
Creating Administrator Account
After logging in, the first step is to secure your administrator account. Use the default admin credentials (or root/administrator for system access) to log in, then immediately change the default password. When accessing Plesk for the first time at https://your-server-ip:8443, select your preferred interface language and update the password.
It’s also a good idea to change the default “admin” username right away. Common usernames are often targeted in automated attacks. You can update this in your account preferences. For added security, consider disabling root/administrator login methods by editing the panel.ini file after setting up your admin account.
If you’re working in a team environment, you can create additional administrator accounts with limited privileges. Go to Tools & Settings > Additional Administrator Accounts under Security. These accounts won’t have access to other users’ accounts, primary settings, or the Action Log.
Once your administrator account is secure, move on to adjusting server settings for performance and security.
Setting Up Server Settings
To get the most out of your server, fine-tune its settings for performance and security.
Performance Optimization
- Enable the Performance Booster to apply system-wide optimizations for web servers, PHP, and databases.
- Turn off unused protocols or interfaces for PHP, databases, mail, and FTP to save resources and reduce security risks.
Web Server Configuration
- Use PHP-FPM with the latest PHP versions for better performance.
- Set up nginx as a reverse proxy to handle static content more efficiently.
- Enable HTTP/2 support to allow faster loading by serving multiple resources over a single connection.
Caching and Compression
- Add multiple caching layers: use OPcache for PHP, enable HTTP caching with nginx, and consider integrating a CDN for high-traffic sites.
- Use Gzip or Brotli compression to speed up loading times. Adjust compression levels as needed to balance file size and server performance.
System Maintenance
- Configure log rotation (logrotate) to prevent logs from consuming too much disk space.
- Adjust PHP settings like memory_limit, upload_size, and max_execution_time based on your application’s needs.
Adding Domains and DNS Setup
Setting up domains and DNS records is essential to ensure your websites are accessible. Plesk’s DNS management tools make it easy to configure the necessary records (A, CNAME, MX, TXT) for your domains.
Setting Up DNS Service
Before managing DNS in Plesk, confirm that the DNS Server component was installed during setup. Also, make sure UDP port 53 is open in your firewall to allow DNS queries to reach your server.
Adding Domains and DNS Records
When adding DNS records in Plesk, you’ll need to specify the record type, domain name, and corresponding value. Common records include:
- A records to point domains to IP addresses
- CNAME records for domain aliases
- MX records to manage email routing
- TXT records for domain verification and SPF settings
Be cautious when modifying DNS records. Deleting an essential A record, for example, could make your website inaccessible. If you’re using Plesk as your primary DNS server, update your domain’s nameserver settings at your registrar. For better performance, you might explore advanced options like GeoDNS or Anycast DNS. Regularly review your DNS settings to fix any misconfigurations or vulnerabilities.
Post-Setup Configuration
After completing the basic setup, there are some key steps you’ll want to take to ensure your server runs smoothly. Focusing on automation, managing users effectively, and keeping an eye on performance can save you from future headaches.
Setting Up Updates and Automatic Updates
Keeping your Plesk installation and server components up to date is a must for both security and performance. While manual updates can be tedious and easy to overlook, enabling automatic updates simplifies the process and ensures your server stays current.
Enabling Automatic Updates in Plesk
To set up automatic updates through the Plesk interface:
- Go to Tools & Settings > Update Settings in the Plesk control panel.
- Enable the following options:
- Automatically install Plesk updates for the latest security patches and features.
- Automatically install updates for third-party components shipped by Plesk, like MySQL and PHP.
- Automatically install system package updates to keep your operating system secure.
- Click OK or Apply to save your settings. Updates typically run during low-traffic hours (2–4 AM).
Using the Command Line
For those who prefer the command line, you can enable automatic updates for Plesk and its components with these commands:
- Enable Plesk updates:
plesk bin server_pref -u -autoupdates true - Enable updates for third-party components:
plesk bin server_pref -u -autoupdates-third-party true - Enable system package updates:
plesk db "INSERT INTO misc(param, val) VALUES('automaticSystemPackageUpdates', 'true') ON DUPLICATE KEY UPDATE val = 'true';"
Things to Keep in Mind
Keep an eye on your server’s disk space, especially if you manage multiple websites or applications. Avoid disabling automatic updates unless you have a specific reason, such as compatibility concerns with certain software versions.
Creating User Accounts and Subscriptions
Good user management helps keep your Plesk environment secure and organized. Plesk’s subscription system allows you to create service packages that define resource limits and permissions, making user management more straightforward.
Setting Up Service Plans
Start by creating service plans that outline resource limits and available features. Navigate to the Service Plans section in the main menu to define these plans. This step ensures consistency and simplifies the onboarding process for new users.
Creating Customer Accounts
In the Customers section, click Add Customer to create new user accounts. You’ll need to enter the customer’s contact details, set login credentials, and assign a service plan. Each customer gets their own control panel with permissions based on the assigned plan. If you’re working in a team environment, consider setting up reseller accounts for managing multiple customers without giving access to the entire server.
Managing Subscriptions
Subscriptions act as hosting packages for specific domains or applications. When creating a subscription, you’ll define details like the domain name, hosting type (e.g., website or domain forwarding), and resource limits. Plesk automatically handles tasks like setting up directories, database access, and email configurations. Using subscription templates can save time and reduce errors for recurring setups.
Configuring Automated Backups
Automated backups are your safety net against data loss, whether from hardware failures, human mistakes, or security breaches.
Setting Up a Backup Schedule
- Go to the Backup Manager under Websites & Domains or the main menu.
- Click Settings for scheduled backups to configure your backup plan.
- Choose a frequency that matches your needs – daily for active websites or weekly for less dynamic ones.
- Schedule backups during low-traffic times, such as 2:00 AM to 6:00 AM, to minimize performance impact.
What to Back Up
Decide what data to include in your backups:
- Website files (HTML, CSS, JavaScript, images, etc.)
- Databases (MySQL, PostgreSQL, etc.)
- Email accounts (mailboxes, filters, and configurations)
- DNS settings (domain records and zone files)
- Plesk configuration (control panel settings and user accounts)
Unless storage is a concern, it’s best to back up everything critical to your operations.
Choosing Storage Locations
You can store backups locally on your VPS or remotely via FTP. Local storage allows quicker restoration, but remote storage provides better protection against hardware failures. Set retention policies that match your storage capacity and recovery needs – for example, keeping 7 daily backups and 4 weekly backups.
Backup Verification
Enable email alerts for backup status and periodically test your backups in a staging environment to ensure they work as expected.
Monitoring Server Resources
Once your backups are in place, monitoring your server is the next step to avoid downtime and performance issues. Plesk includes built-in monitoring tools, and you can also integrate external solutions for more advanced tracking.
Using Plesk’s Built-In Monitoring
Install the Monitoring extension from the Extensions Catalog to track essential metrics like CPU usage, memory consumption, disk space, and network traffic. Set email alerts for thresholds like 80% CPU usage, 85% memory usage, and 90% disk space usage to catch problems early.
Advanced Monitoring Options
For more in-depth monitoring, consider using Plesk 360 Monitoring for $3.99 per month. This service includes website availability tracking, multi-server monitoring, and notifications through SMS or Slack.
“Our state-of-the-art monitoring software notifies our team of abnormal web server requests and resource usage which may affect server performance. This helps us leap into action when adjustments to your server are required.”
- Nocinit
Optimizing Resources
Use the insights from monitoring tools to improve server performance. If memory usage is consistently high, you may need to upgrade your plan or optimize your applications. Custom dashboards can help you focus on the most critical metrics, ensuring timely adjustments to your resource allocation.
Regular monitoring not only helps you prevent issues but also ensures your server operates efficiently. Combined with VPS.us’s reliable infrastructure and 24/7 global support, you’ll have the tools and assistance needed to keep your server running smoothly.
Conclusion and Next Steps
Setting up Plesk on your VPS lays a solid groundwork for managing your websites and applications efficiently. You’ve covered the key steps – from connecting to your server and installing Plesk to configuring automated backups and monitoring resources. Now, it’s time to shift your focus to ongoing optimization and proactive maintenance to keep your server running smoothly.
Regular maintenance is critical for ensuring security, minimizing downtime, and extending the lifespan of your server. This includes staying up to date with software updates, conducting regular security checks, and closely monitoring performance metrics.
To get the most out of your VPS, prioritize server optimization, security, and routine maintenance. Fine-tune services like Apache and MySQL, set appropriate resource limits, and monitor performance continuously. On the security side, use firewalls, enforce strong password policies, apply patches promptly, and secure your websites with SSL/TLS certificates. Proactive monitoring and automated updates are essential to staying ahead of potential risks.
As data center workloads have nearly doubled in the past five years, efficient server management has become more crucial than ever. Balancing rigorous security measures with performance tuning will help you handle this growing demand while protecting your data and maintaining reliability.
For reliable infrastructure, VPS.us offers enterprise-grade hardware across 17 global locations, unmetered traffic, and 24/7 support. Starting at just $10/month, their KVM VPS plans provide root access, NVMe storage, and scalable resources to adapt as your hosting needs grow.
To keep your Plesk-powered VPS secure and dependable, set clear benchmarks and automate routine tasks. Regularly review logs, perform security audits, and test your backup procedures. With consistent management and a dependable hosting partner, your VPS will remain a powerful and reliable platform for your web hosting needs.