
Step 1: Choose the Right VPS Size and Region
Your Coolify install will only feel fast if the VPS matches the workload. For most indie projects, the sweet spot is a KVM VPS with 2 vCPU, 4 GB RAM, and 60–80 GB SSD. That configuration gives Docker enough headroom for Coolify itself, one or two app containers, logs, and image pulls without constant memory pressure. If the server is undersized, the first indicators are slow container starts, failed builds, or the kernel terminating containers when RAM is exhausted.
Use the following sizing table as a starting point:
| App type | Typical containers | Recommended VPS size | Why this works | Best region choice |
|---|---|---|---|---|
| Static site + reverse proxy | 2–3 | 1 vCPU, 2 GB RAM, 25+ GB SSD | Suitable for Coolify + nginx/Caddy with minimal background activity | Closest to most visitors |
| Small API + Redis | 3–5 | 2 vCPU, 4 GB RAM, 60+ GB SSD | Provides extra CPU for app bursts and sufficient RAM to avoid swap during deploys | Closest to users or the database |
| API + Postgres | 4–6 | 2–4 vCPU, 6–8 GB RAM, 80+ GB SSD | Leaves extra memory for database caching and disk growth | Same region as primary users |
| Multiple client apps / staging + prod | 6–10 | 4 vCPU, 8 GB RAM, 120+ GB SSD | Prevents noisy-neighbor effects among containers on the same host | Region nearest your team and users |
For high-performance and reliable hosting, consider VPSus KVM VPS plans.
The key takeaway: plan for RAM first, then CPU. Docker hosts tend to fail from memory starvation before raw CPU capacity is exhausted.
Region matters as much as server size. Every additional 1,000 km roughly adds 10–20 ms of network delay, affecting API response times and overall dashboard responsiveness. Choosing the Best Development Server for Your Projects explains how to select a node close to your users rather than your own location. For example, if you are based in the US and serving European customers, deploying in Europe will help minimize latency.
This command helps compare latency between regions before provisioning:
for host in fra.example.test lon.example.test dallas.example.test sgp.example.test; do
  echo "=== $host ==="
  ping -c 4 $host | tail -1
done
Replace the hostnames with test IPs or looking-glass targets from your provider’s regions. Lower average latency is preferred; averages under 30 ms feel local, 80–120 ms is acceptable, and 150+ ms will delay admin actions and API calls noticeably.
After the VPS boots, verify that the setup is successful with:
ssh user@your_server_ip 'whoami && sudo -n true && uname -a'
Expected output: deploy, no sudo password prompt, along with your Linux kernel details. Once verified, proceed to secure SSH before installing further software.
Step 2: Secure SSH Access and Basic Hardening
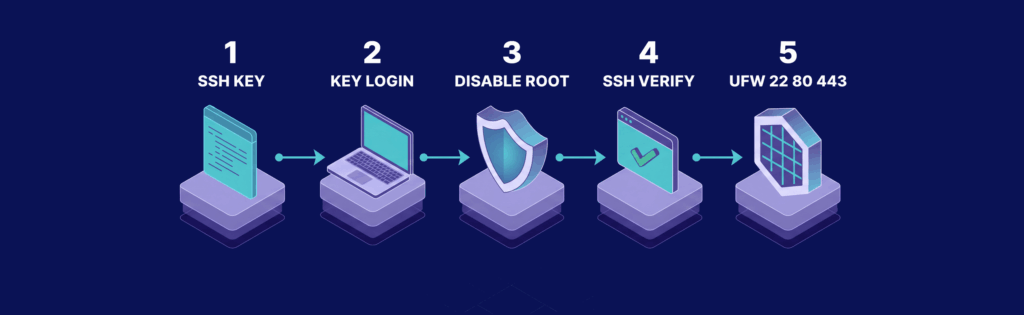
Before installing Docker or Coolify, secure your VPS. A newly provisioned server with password-based SSH and open ports is vulnerable to brute-force attacks over port 22.
If you did not inject your SSH key during provisioning, generate one on your local machine now using the modern ed25519 algorithm:
ssh-keygen -t ed25519 -C "coolify-vps" -f ~/.ssh/coolify_vps
ssh-copy-id -i ~/.ssh/coolify_vps.pub deploy@your_server_ip
Test the new key by opening a new session:
ssh -i ~/.ssh/coolify_vps deploy@your_server_ip
You should log in without a password prompt.
Harden SSH by disabling password-based login and direct root access:
sudo cp /etc/ssh/sshd_config /etc/ssh/sshd_config.bak
sudo sed -i 's/^#\?PermitRootLogin.*/PermitRootLogin no/' /etc/ssh/sshd_config
sudo sed -i 's/^#\?PasswordAuthentication.*/PasswordAuthentication no/' /etc/ssh/sshd_config
sudo sed -i 's/^#\?PubkeyAuthentication.*/PubkeyAuthentication yes/' /etc/ssh/sshd_config
sudo systemctl restart ssh
Verify the configuration:
sudo sshd -T | grep -E 'permitrootlogin|passwordauthentication|pubkeyauthentication'
Expected output must include permitrootlogin no, passwordauthentication no, and pubkeyauthentication yes.
Next, secure your firewall so that only SSH, HTTP, and HTTPS ports remain accessible:
sudo ufw default deny incoming
sudo ufw default allow outgoing
sudo ufw allow 22/tcp comment 'SSH'
sudo ufw allow 80/tcp comment 'HTTP'
sudo ufw allow 443/tcp comment 'HTTPS'
sudo ufw enable
sudo ufw status verbose
The expected output should list ports 22, 80, and 443 as allowed, with incoming traffic denied by default.
Hardening Checklist
- Generate a local SSH key
ssh-keygen -t ed25519 -C "coolify-vps"
- Copy the public key to the server
ssh-copy-id deploy@your_server_ip
- Confirm key-based login works
ssh user@your_server_ip
- Disable root SSH login
sudo sed -i 's/^#\?PermitRootLogin.*/PermitRootLogin no/' /etc/ssh/sshd_config
- Disable password authentication
sudo sed -i 's/^#\?PasswordAuthentication.*/PasswordAuthentication no/' /etc/ssh/sshd_config
- Restrict UFW to allow only SSH, HTTP, and HTTPS
sudo ufw allow 22,80,443/tcp
- Check the final firewall state
sudo ufw status numbered
With SSH secured and inbound traffic limited to essential ports, you are ready to install Docker.
Step 3: Install Docker Engine on Your VPS
With SSH and firewall protection in place, install Docker from an APT repository you control. Using a proper repository over one-line install scripts ensures auditability and region-local mirroring where available.
Set up Docker’s signed repository and install Docker Engine and CLI:
sudo install -m 0755 -d /etc/apt/keyrings
curl -fsSL https://download.docker.com/linux/ubuntu/gpg | \
  sudo gpg --dearmor -o /etc/apt/keyrings/docker.gpg
sudo chmod a+r /etc/apt/keyrings/docker.gpg
echo \
"deb [arch=$(dpkg --print-architecture) signed-by=/etc/apt/keyrings/docker.gpg] \
https://download.docker.com/linux/ubuntu \
$(. /etc/os-release && echo "$VERSION_CODENAME") stable" | \

sudo tee /etc/apt/sources.list.d/docker.list > /dev/null
sudo apt update
sudo apt install -y docker-ce docker-ce-cli containerd.io docker-buildx-plugin docker-compose-plugin
sudo systemctl enable --now docker
Verify that Docker is installed properly:
apt-cache policy docker-ce | head
sudo systemctl status docker --no-pager
docker version
Expected results:
- The output of
apt-cache policyshows Docker packages are sourced fromdownload.docker.com. systemctl statusconfirms that Docker is active (running).docker versiondisplays both Client and Server version details.
Optionally, if your provider offers a region-optimized Docker mirror, adjust the URL in the repository configuration.
Perform a sanity test:
sudo docker run --rm hello-world
Expected output includes: “Hello from Docker!” confirming that Docker is operational.
Step 4: Install and Configure Coolify
Now that Docker is confirmed healthy, install Coolify using a downloadable installer script. This method lets you review the script before execution and ensures predictable re-deployment.
Download and run the installer:
curl -fsSL https://cdn.coollabs.io/coolify/install.sh -o install-coolify.sh
chmod +x install-coolify.sh
head -n 40 install-coolify.sh
sudo ./install-coolify.sh
Verify that the installer finished cleanly:
docker ps --format 'table {{.Names}}\t{{.Status}}\t{{.Ports}}'Expected output: A running Coolify container and its supporting services, with HTTP/HTTPS ports correctly bound. If no ports are open, inspect the logs with:
docker logs coolify
Understand Installer Options
Coolify stores its state locally, so it’s important to decide where the data and port bindings reside. If your server already uses port 80 or 443 for another purpose, adjust the bindings to avoid conflicts.
For example, keep Coolify files in a dedicated directory and explicitly set ports:
sudo mkdir -p /var/lib/coolify
sudo env \
  COOLIFY_APP_PORT=80 \
  COOLIFY_HTTPS_PORT=443 \
  COOLIFY_DB_PATH=/var/lib/coolify/db \
  COOLIFY_DATA_PATH=/var/lib/coolify \

 ./install-coolify.sh
Verify port mapping:
sudo ss -tulpn | grep -E ':80|:443'
Expected output: Listeners on the selected ports.
Customize Storage Path
If your VPS offers a faster mounted volume, use it to reduce I/O contention. For instance, mount an NVMe-backed volume at /mnt/nvme/coolify:
sudo mkdir -p /mnt/nvme/coolify
sudo chown -R $USER:$USER /mnt/nvme/coolify
sudo chmod 755 /mnt/nvme/coolify
Then, create a .env file with initial admin details:
COOLIFY_APP_PORT=80
COOLIFY_HTTPS_PORT=443
COOLIFY_DB_PATH=/mnt/nvme/coolify/db
COOLIFY_DATA_PATH=/mnt/nvme/coolify
COOLIFY_ADMIN_NAME=Your Name
COOLIFY_ADMIN_EMAIL=admin@example.com
COOLIFY_ADMIN_PASSWORD=replace-with-a-long-random-password
Load the environment and run the installer:
set -a
source .env
set +a
sudo -E ./install-coolify.sh
Verify Coolify has picked up the correct paths:
docker inspect coolify | grep -A4 /mnt/nvme/coolify
Expected output: Bind mounts pointing to /mnt/nvme/coolify.
Step 5: Configure Persistent Storage and Environment Variables
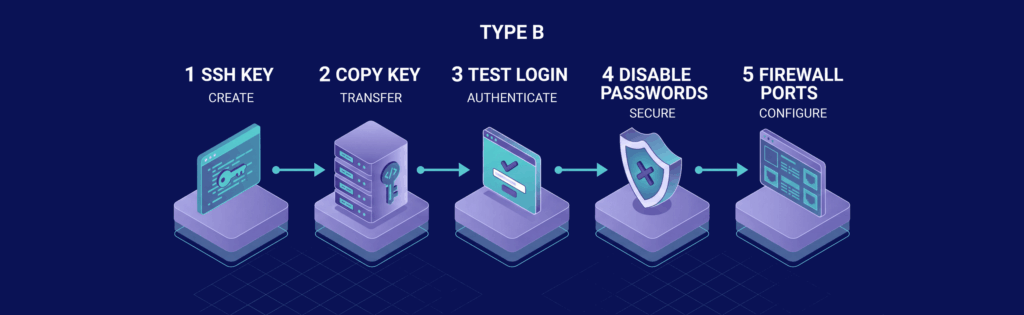
To ensure data persists across container restarts, use a dedicated storage disk and mount it predictably. Confirm that your NVMe-backed path is mounted properly:
findmnt /mnt/nvme
df -h /mnt/nvme
lsblk -f
Expected output: /mnt/nvme should be mounted with sufficient free space.
Next, expose durable app data through Docker volumes. For example:
services:
  coolify:
    image: ghcr.io/coollabsio/coolify:latest
    env_file:
      - .env
    environment:
      COOLIFY_APP_ROOT: /data/coolify
      COOLIFY_BACKUP_PATH: /data/coolify/backups
      COOLIFY_LOG_PATH: /data/coolify/logs
    volumes:
      - coolify-data:/data/coolify
      - /var/run/docker.sock:/var/run/docker.sock
    restart: unless-stopped

volumes:
  coolify-data:
    driver: local
    driver_opts:
      type: none
      o: bind
device: /mnt/nvme/coolify- Verify that the volume is active inside the container:
docker compose up -d
docker inspect $(docker compose ps -q coolify) --format '{{json .Mounts}}' | jq
Expected: The mount should display Source as /mnt/nvme/coolify and Destination as /data/coolify.
Your .env file should also include non-sensitive defaults:
COOLIFY_APP_ROOT=/data/coolify
COOLIFY_BACKUP_PATH=/data/coolify/backups
COOLIFY_LOG_PATH=/data/coolify/logs
TZ=UTC
For sensitive data, inject secrets during CI. For example, this deployment snippet fetches metadata and passes it to Docker without storing secrets in the repository:
deploy:
  image: alpine:3.20
  stage: deploy
  before_script:
    - apk add --no-cache curl jq docker-cli docker-cli-compose

  script:
    - export META_URL="http://169.254.169.254/metadata"
    - export APP_DOMAIN="$(curl -fsSL "$META_URL/app_domain")"
    - export APP_SECRET="$(curl -fsSL "$META_URL/app_secret")"
    - printf "APP_DOMAIN=%s\nAPP_SECRET=%s\n" "$APP_DOMAIN" "$APP_SECRET" > runtime.env
    - cat runtime.env | sed 's/APP_SECRET=.*/APP_SECRET=redacted*/'
    - docker --context production compose --env-file runtime.env up -d
Verify that the environment variables are loaded correctly:
docker exec $(docker compose ps -q coolify) env | grep -E 'COOLIFY_APP_ROOT|APP_DOMAIN'
Expected output: The configured path and domain appear.
Step 6: Deploy a Sample Application with Coolify
To validate your installation, deploy a sample application from a public Git repository. In the Coolify dashboard, open your project and click New Resource or New App. Choose Public Repository, then fill in the repository URL, branch (e.g., main), and select the build method: either Build Pack or Dockerfile.
For Dockerfile setups, specify the correct Dockerfile path (e.g., /Dockerfile or /docker/production.Dockerfile). For build packs, set the base directory if your app resides in a subfolder. Common deployment issues arise from misconfigured paths rather than Coolify faults.
Set the deployment parameters:
- Port: the internal port on which your app listens (commonly
3000,8000, or8080) - Environment Name: e.g.,
production - Domain: for example,
demo.yourdomain.com - Auto Deploy: disable initially to manually trigger the deployment
Click Deploy. You should observe status changes from Queued to Building, Deploying, and finally Running. If the endpoint does not return a proper response, review the deployment logs in the dashboard.
Test the application endpoint with:
curl -I https://demo.yourdomain.com
Expected output: HTTP status 200 (e.g., HTTP/2 200 or HTTP/1.1 200 OK).
Step 7: Set Up Health Checks and Auto-Restart
Even if a container shows as running, it might be malfunctioning. Configure a health check that periodically probes an endpoint (like /health or /ready) and triggers a restart if the check fails persistently.
For example, configure the health check as follows:
services:
  app:
    image: your-image:latest
    restart: always
    healthcheck:
      test: ["CMD-SHELL", "curl -fsS http://127.0.0.1:3000/health || exit 1"]
      interval: 30s
      timeout: 5s
      retries: 3
      start_period: 20s
Verify the container health:
docker inspect --format '{{.State.Status}} {{.State.Health.Status}}' $(docker ps -q --filter name=app)Expected output: running healthy. Note that after failing the health check for roughly 90 seconds (3 intervals of 30s), Docker will mark the container as unhealthy.
For broader monitoring, consider running a Prometheus exporter (e.g., cAdvisor) on the host and setting alert rules. For instance, an alert rule to detect containers down for 2 minutes:
groups:
  - name: docker-alerts
    rules:
      - alert: ContainerDown
        expr: time() - container_last_seen{name=~".*app.*"} > 120
        for: 2m
        labels:
          severity: warning
        annotations:
          summary: "Container not reporting metrics"
          description: "The app container has not been seen by cAdvisor for more than 2 minutes."
Verify the exporter with:
curl -s http://127.0.0.1:8080/metrics | grep container_last_seen | head
Expected output: At least one line containing container_last_seen.
Test failure recovery by simulating a crash:
docker kill $(docker ps -q --filter name=app)
sleep 5
docker ps --filter name=app --format 'table {{.Names}}\t{{.Status}}'
Expected: The container should reappear with a status like Up 3 seconds, confirming that restart: always is active.
Step 8: Verify Deployment and Troubleshoot Common Issues
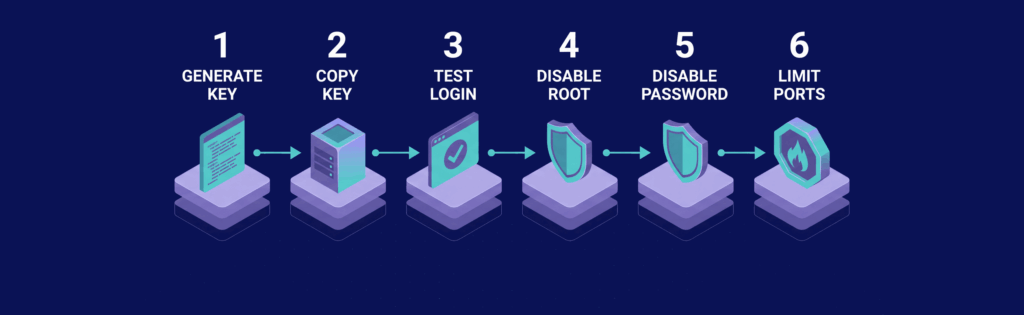
After confirming that auto-restart works, verify that the application is accessible from its external endpoint. Begin by checking the endpoint and reviewing container logs, port bindings, storage volumes, and environment variables.
Perform basic checks:
curl -I http://your-app-domain-or-ip
curl -s http://your-app-domain-or-ip/health
Expected output: HTTP status 200 (e.g., HTTP/1.1 200 OK or HTTP/2 200) and a healthy response from the /health endpoint. If issues persist (such as curl hanging or returning 502), inspect the container:
docker ps --format 'table {{.Names}}\t{{.Status}}\t{{.Ports}}'
 docker logs --tail=50 <container_name>
Look for error messages (e.g., module not found, failed to bind port, or permission denied) that might indicate issues with volume mounts or other misconfigurations.
Troubleshooting Checklist
| Check | Diagnosis Command | What Failure Looks Like | Fix |
|---|---|---|---|
| App port exposed | docker ps sudo ss -tulpn | grep -E ‘:80|:443|:3000’ | Host port missing or occupied despite the application listening internally | Stop the conflicting service or change the published port |
| Volume mounted | docker inspect <container_name> –format ‘{{json .Mounts}}’ | Missing bind mount or incorrect host path | Recreate the volume with the correct host path |
| Volume permissions | ls -ld /mnt/nvme/coolify | Permission issues; logs show permission denied | Fix ownership with sudo chown -R 999:999 /mnt/nvme/coolify |
| Environment variables loaded | docker exec <container_name> env | sort | Required environment variables missing or misconfigured | Re-add the variable, then redeploy |
For a reliable production experience, ensure that your server is properly monitored and configured.
How to Configure a DevOps Server provides additional insights into securing and optimizing your server.